If you’re just starting to work with resin, it may be tempting to use UV resin and epoxy resin interchangeably. I mean, why wouldn’t you? They’re both resins with an enamel appearance. Why couldn’t they be used for similar projects?
But, you might be surprised to learn about the several key differences between the two mediums, making them far from interchangeable. In fact, one might be well-suited for your next project while the other could result in a complete artistic disaster.
To sum it up, UV resin is activated and hardened by UV light whereas epoxy resin must first be mixed with a hardener. This key difference, along with a few other variations, make one type of resin more suited to certain projects than the other. Both mediums are made from toxic materials, so be sure to wear gloves and a mask while you work.
Keep reading to learn about all the differences of uv resin vs epoxy and how to pick the best medium for your next art project.
TABLE OF CONTENTS
- What is UV Resin?
- What is Epoxy Resin?
- How to Get Started with Resin – A Beginner’s Guide
- UV Resin vs Epoxy Resin: A Side-by-Side Comparison
- Key takeaway
What is UV Resin?
UV resin is a synthetic material created through industrial polymerization. In order to cure and harden, this type of resin requires energy radiation from UV light (hence the name – UV resin). Once exposed to a natural or artificial light source, UV resin will begin its photochemical process and harden almost immediately.

Because of this, UV resin is a one-part resin, meaning it doesn’t require any pre-mixing or other preparation to use like some other resins. Rather, it is ready to use directly out of the bottle and won’t dry or harden during use, making the timeframe for working with UV resin almost limitless.
These qualities have given UV resin the nickname “resin for the impatient” as it doesn’t require any preparation and hardens quickly with UV radiation. However, this type of resin does not come without its own challenges.
Challenges of using UV Resin
One common issue many artists encounter with this medium is difficulty getting it to harden, even after UV light has been applied. There are several reasons for this:
First, your light source may not be powerful enough to properly cure the resin. UV resin requires at least 4 watts to harden – this can be from a lamp, a flashlight, a torch, or even the sun.

Alternatively, if you cast your UV resin too thick, it can cause problems during the curing process as it won’t be able to effectively harden. A good rule of thumb is to keep your UV resin under 3mm thick.
If your project requires a thicker cast, try building up to that thickness with several smaller layers and curing each one separately. Adding embellishments, like flowers or glitter, can also delay curing time.

How Durable is UV Resin?
In terms of durability, UV resin isn’t the most heavy-duty medium on the market. Even though it hardens quickly, this resin will easily flake off or blister if it is exposed to heat or too much sunlight. It also will not stand up to scratching. Thus, UV resin has a shorter lifespan.
This type of resin is also slightly more expensive and can require additional curing equipment, like a UV lamp.
Plus, the shelf life is only six months, making bulk purchases less than ideal.
What Type of Projects are Best for UV Resin?
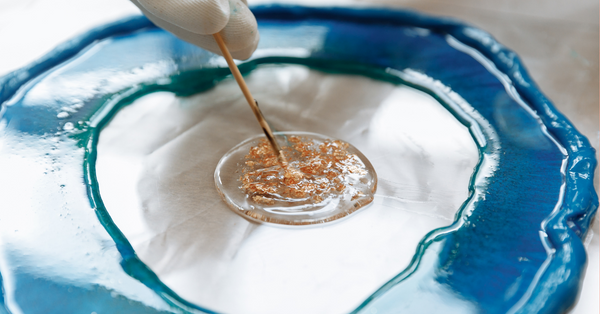
UV resin is great for small, flat projects like jewelry or ornaments, and it allows for more detailed work since it won’t harden without a UV light source.
It’s easy to use and doesn’t require any pre-mixing or preparation, making it great for beginners.
We recommend the Limino UV Resin Hard Transparent Glue & Coating for making small items with UV Resin. It’s great quality, cures quickly under UV or sunlight, and is yellow-resistant and water-resistant.

– Pros & Cons of UV Resin –
Pros of UV Resin
Easy to apply
No preparation needed
Hardens quickly with a UV light source
Great for beginners
Cons of UV Resin
Requires UV light for curing
Not great for large projects
Not the most durable
Shorter shelf life and more expensive
What is Epoxy Resin?

Epoxy resin is a synthetic material created through industrial chemical polymers. Unlike UV resin, epoxy is a 2-part resin, meaning it requires a hardener in order to successfully cure. This can add an additional step when preparing the resin for use, but it eliminates the need for UV lamps or other lighting equipment to initiate the curing process. However, the two parts must be mixed with care and accuracy in order to produce the optimal reaction for effective curing.
Unlike UV resin, your time before epoxy resin hardens is very limited. Once mixed with the hardener solution, this type of resin will immediately start the curing process, which can reduce the amount of time you have to work.
Furthermore, the reaction between the two products often creates little bubbles of trapped air which will need to be removed by heat to achieve a clean finish.
Is Epoxy Resin Suitable for Beginners?
Epoxy resin requires a certain level of skill and precision for best results that UV resin does not require. You have to work quickly to mold the resin into the shapes that you want before it becomes too hard to use easily.
That doesn’t mean it’s off limits for beginners! But it’s good to be aware of these potential challenges of working with epoxy resin before diving in.
How Long Does Epoxy Resin Take to Cure and Harden?
At the same time though, epoxy resin can take 2-4 days to fully cure and harden, making it less time efficient overall.
How Durable is Epoxy Resin?
The durability of epoxy resin far exceeds that of UV resin. In its final state, this resin will harden into a solid, clear mass resistant to heat and scratching. Plus, the shelf life of the product is up to three years, allowing for more bulk purchases, and it is often cheaper than other types of resin, such as UV resin.
What Type of Projects are Best for Epoxy Resin?
Epoxy resin is great for projects that need a high-quality, long-lasting finish. If curing time is more of a concern, then you might need to look at another medium. Likewise, if you need more time to work and mold your resin, epoxy might not be the best option.
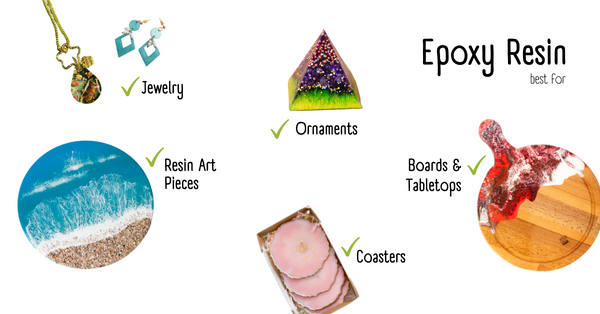
This medium can be used to create almost anything from jewelry and decor to kitchen countertops and tables. There is no limit to how thick you can cast epoxy, which allows for oversized, 3D items.

For a good all-round expect resin, we recommend Naked Fusion Epoxy Resin Art Clear Crystal Formula. It suits any project – from jewellery, geodes, art pieces, to sealing tabletops and countertops. It’s also non-toxic and odor free so it’s more comfortable to work with than other brands.
If you’re just getting started, there are also some great beginners kits like this Sumerbox Clear Cast Epoxy Resin Kit. It has everything you need for your first project, including your resin, protective gear, molds, colorants, mixing sticks, and even glitter!
– Pros & Cons of Epoxy Resin –
Pros of Epoxy Resin
Very durable and long-lasting
Doesn’t require additional equipment to harden
Can be used for large products
Has a longer shelf life and is cheaper
Cons of Epoxy Resin
Requires more preparation time
Needs 2-4 days to completely harden
Not the most durable
Begins curing immediately which limits working time
How to Get Started with Resin – A Beginner’s Guide
Getting Started with UV Resin
If you’ve never worked with these mediums before, you might not know where to start, and that’s okay! We’ve pulled together a list of things you’ll need to get started with each, along with when to pick one over the other.
To get started with UV resin, you’ll need the following items:
- UV resin
- UV lamp or torch
- Silicon mold
- Color pigments and embellishments (if desired)
- Mixing cups and stirrers (we recommend popsicle sticks)
- Face mask and gloves
Once you’ve gathered all of your materials, lay out a tarp, plastic sheet, or piece of cardboard to avoid making a large mess.

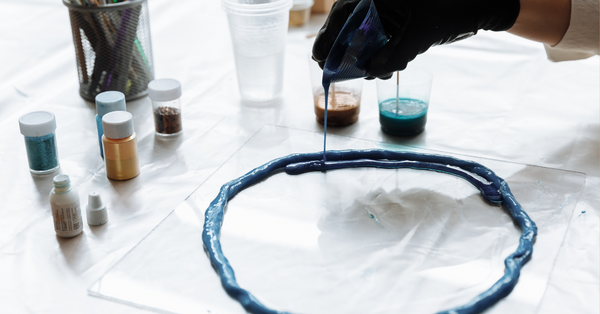
Then, mix your resin with the desired color pigments in your mixing cup and stir (if you’re not sure how to color your resin, check out this quick guide).
Pour the mixture into your mold, or apply to your desired surface using a brush.
Add any desired embellishments, and then, hold or place your UV light source directly over your resin for several minutes while it dries.
Once dried, you should be able to easily pop the resin out of the mold.
How to color your resin
Whether you’re using UV resin vs Epoxy, there are many materials you can use to color your resin, like alcohol inks and even acrylic paint. But for vibrant long-lasting color, using a liquid or powder colorant that’s designed for resin will give the best finish.
These 24 Mica Powder Color Pigments by Rolio will be a worthy investment if you plan to create a variety of resin pieces.
Getting Started with Epoxy Resin
To get started with epoxy resin, you’ll need the following items:
- Epoxy resin and hardener (usually sold together)
- Silicon mold
- Color pigments and embellishments (if desired)
- Mixing cups and stirrers (we recommend popsicle sticks)
- Face mask and gloves

Once you’ve gathered all of your materials, allow your resin and hardener to sit in a shallow bath of warm water for 10-20 minutes (this makes it easier to work with).
While your product heats, lay out a tarp, plastic sheet, or piece of cardboard to avoid making a large mess.
Mix equal parts resin and hardener and slowly stir for several minutes. Then, mix your resin with the desired color pigments in your mixing cup and stir (we recommend to color your resin with Mica Powders to get the best finish).
Pour the mixture into your mold, or apply to your desired surface using a brush. Add any desired embellishments.
Allow your resin to dry for several days in a well-ventilated space. Once dried, you should be able to easily pop the resin out of the mold. And viola!
Epoxy Resin vs UV Resin: Side-by-Side Comparison
| Category | UV Resin | Epoxy Resin |
|---|---|---|
| Preparation | None | Mix equal parts resin and hardener |
| Curing | Cures in a few minutes with UV light | Cures without aid in 2-4 days |
| Thickness | 3-4mm max | No maximum |
| Durability | Low, easily damaged | High, resistant to most damage |
| Cost | More expensive, shorter shelf life | Less expensive, longer shelf life |
Key takeaway
Ultimately, both epoxy and UV resin are great mediums to incorporate into your artistic portfolio. These synthetic resins can be used to make a wide range of 3D artwork and functional items, leaving behind a beautiful, enamel-like finish. They each have their respective pros and cons, but now that you’ve learned the difference, you can confidently pick one for your next project.


