Acrylic paint is one of the most versatile and adaptable mediums on the market today. But, you might be asking – can you use acrylic paint on metal surfaces effectively?
The short answer is yes, it can! However, there are quite a few things to consider before jumping right into your next project. You’ll want to prime the surface, pick an appropriate type of acrylic paint, and finish with a sealant.
We’ll go over the ins and outs of painting metal with acrylics, so you’ll have everything you need to know to get started.
TABLE OF CONTENTS
- What Metal Items Are Good for Painting?
- What’s the Best Acrylic Paint to Use on Metal?
- Painting on Metal – A Step by Step Guide
- Tips & Tricks for Using Acrylic Paint on Metal
- Frequently Asked Questions
- Summary
What Metal Items are Good for Painting?
First, you might be asking, what metal items are good for painting? The truth is almost anything you can think of! From art projects to DIY home improvement, there are tons of metal objects you can consider painting.
If you’re interested in DIY projects around the house, acrylic paint is great for things like patio furniture, fences, chairs, door handles, garage doors, and more. You can apply paint to both interior and exterior items or parts of your home.

What’s the Best Type of Acrylic Paint to Use on Metal?
Once you’ve selected a surface to paint, you’ll want to decide on the best type of acrylic paint to use.
To keep things simple, you can look into purchasing an acrylic paint and primer in one. This will eliminate an entire step from your DIY or art project.
However, if you’re working on metal that will be exposed to the elements, then you should consider buying an acrylic paint with a rust protector. This will help maximize the longevity of your final piece and reduce the chance of it becoming hazardous overtime.
Painting Metal – A Step by Step Guide
Now that you’ve selected a surface and a paint, you are ready to get started. Be sure to collect the following materials (they’ll come in handy):
- Acrylic paint
- Primer
- Mineral spirits and degreaser (if needed)
- Paint brushes
- Masking tape
- Gloves and mask
- Rags
- Fine sandpaper
- Wire brush
- Soap and water
- Sealant
1 – Prepare Your Surface
After you’ve gathered the above materials, you’ll want to take some time prepping your metal surface to be painted. This step can vary depending on the item you’re working on along with its condition. But, here are some common steps you should consider taking:
Step #1: Remove or Cover Fixtures

If there are parts of the object you DON’T want to paint, you’ll need to either remove these parts (e.g., knobs or glass windows) or put some masking tape over it.
This is also a great place to use masking tape to add fun designs and patterns, if desired.
Step #2: Strip Rust and Old Paint

Be sure to wear protective gear (like a mask and gloves) for this step, especially if rust is present.
- First, wipe the surface clean with your rag.
- Then, use your fine sandpaper and wire brush to scrape any rust and paint off the metal surface.
- Once it’s mostly stripped, give it another wipe before washing clean with soap and water.
- Finally, wipe with mineral spirits to ensure good adhesion and allow it to dry.
Step #3: Repair Dents and Holes

Depending on the condition of your metal piece, you might want to spend some time repairing any damage.
Sand the area first, and then, wipe with degreaser and mineral spirits. Inject the area with epoxy-based composite or filler. You can also use fiberglass mesh for larger holes and dents.
Step #4: Prime the Surface

For best results, your primer should work with acrylic paint and be created specifically for use on metals. Apply an even coat of primer across the entire surface you plan to paint and allow it to dry.
Then, apply a second coat of primer to best protect your metal from the process of oxidation. This is a very important step as it will protect your final piece from corrosion and exposure over time.
TIP! Avoid using any polish before painting as it will cause your acrylic paint to not adhere as well.
2 – Paint the Surface
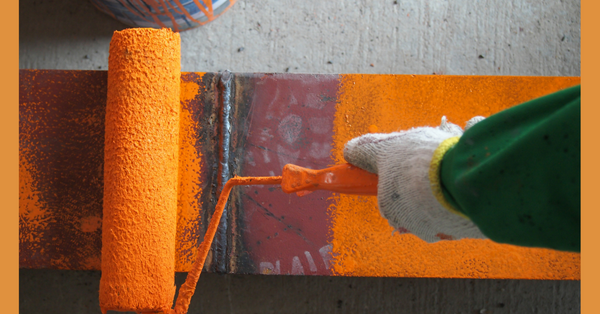
Once your primer has dried completely, you’re ready to move on to painting.
If you’re painting an object that will be outside, you should opt for exterior acrylic paint. Otherwise, you can use ordinary acrylic paint.
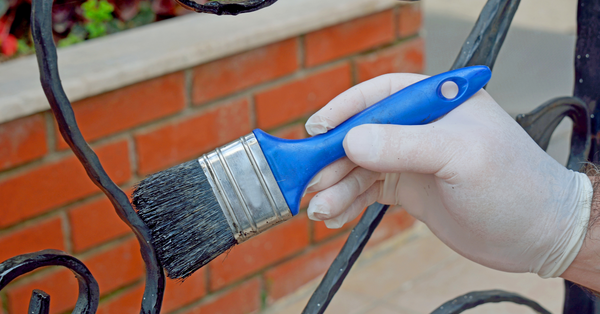
Use your paint brushes to apply a thin, even coat of paint to your metal surface. Allow the first layer to dry completely, and then, apply a second coat. You can even consider a third coat of paint if you are concerned about exposure and longevity.
Multiple thin coats of paint are much more effective than one thick layer of paint. Allow the paint to dry for at least 48 hours in a dry, well-ventilated space.
3 – Apply a Sealant for Further Protection

This step isn’t always required, but it helps add a glossy finish to the final product while also offering longer-lasting protection. You can choose a clear sealant or opt for a stain if you’d like to add some more color.
Most metal sealants work with aluminum, steel, copper, and zinc. Double check the properties on the sealant to ensure it will work for your project.
After the acrylic paint has dried for at least 48 hours, wipe the surface clean from dirt or dust that has collected. Then, apply a single coat of sealant and allow it to dry.
Tips & Tricks for Using Acrylic Paint on Metal

For best results, follow these tips and tricks for painting your metal piece:
Don’t skip the primer
In this case, the primer is more important than the paint itself. You don’t want to skip this step as your metal surface will quickly rust and become damaged by corrosion and exposure overtime. Your finished piece will last much longer by applying two thin coats of primer.
Always wear protective gear
Painting metal can be a hazardous and dirty process. Don’t wear your best clothes as they can quickly and easily become filthy or covered in paint. Also, be sure to wear protective gear like a face mask and gloves. Rust and other toxins can be hazardous to your health.
Allow your paint to dry
This seems like an obvious one, but we had to say it. Be sure to allow your final piece to dry for at least 48 hours before putting it into use. Make sure it is stored in a dry, well-ventilated, and isolated area for the entirety of the drying process.
Wash your brushes immediately
Just like with any other acrylics project, you’ll want to wash your brushes immediately after use. Acrylic is water-based, so it’s very easy to clean; however, once it dries, it becomes very hard and water-resistant. Save your brushes and your time by washing immediately after each use.
Frequently Asked Questions
Can you use a brush to paint on metal surfaces?
You can use a brush or a roller to apply acrylic paint to metal surfaces. You might also opt for spray paint, depending on the item you’re painting. No matter how you apply your paint, you’ll want multiple thin coats – just make sure each layer is dry before you add another one.
Is acrylic paint on metal waterproof?
While most acrylic paint is water-resistant when dried, you should still take the time to apply a layer of sealant to further protect your piece from the elements. This is especially true if your final piece will live somewhere outside.
Is more than one coat of paint/primer needed?
Yes! You should always apply two coats of primer. Avoid applying more than two coats as it can make the paint soft. In terms of acrylic paint, you can apply as many coats as you’d like, but we recommend at least 2-3 layers for optimal results. One layer of sealant should be enough for most scenarios.
Ultimately…
Painting a metal surface can be a fun art project or a great way to spruce up your home decor! Be sure to take the time to prep and prime your surface and finish with a layer of sealant to ensure your final piece has a long, happy life.

